Normalizer transformation is a smart way of representing your data in more organized manner. It is used to convert a single row into multiple rows and vice versa. If in a single row there is repeating data in multiple columns, then it can be split into multiple rows. Sometimes we have data in multiple occurring columns. For example


| Student Name | Class 9 Score | Class 10 Score | Class 11 Score | Class 12 Score |
| Student 1 | 50 | 60 | 65 | 80 |
| Student 2 | 70 | 64 | 83 | 77 |
In this case, the class score column is repeating in four columns. Using normalizer, we can split these in the following data set.
| Student Name | Class | Score |
| Student 1 | 9 | 50 |
| Student 1 | 10 | 60 |
| Student 1 | 11 | 65 |
| Student 1 | 12 | 80 |
| Student 2 | 9 | 70 |
| Student 2 | 10 | 64 |
| Student 2 | 11 | 83 |
| Student 2 | 12 | 77 |
Step 1 – Create source table "sales_source" and target table "sales_target" using the script and import them in Informatica
drop table sales_source;drop table sales_target;CREATE TABLE sales_source ( store_name varchar2(20), sales_quarter1 NUMBER(5), sales_quarter2 NUMBER(5), sales_quarter3 NUMBER(5), sales_quarter4 NUMBER(5)); create table sales_target ( store_name varchar2(20), sales number(5), quarter number(3) );insert into sales_source values ( 'DELHI',150, 240, 450, 100);insert into sales_source values ( 'MUMBAI',100, 500, 350, 340);COMMIT;/
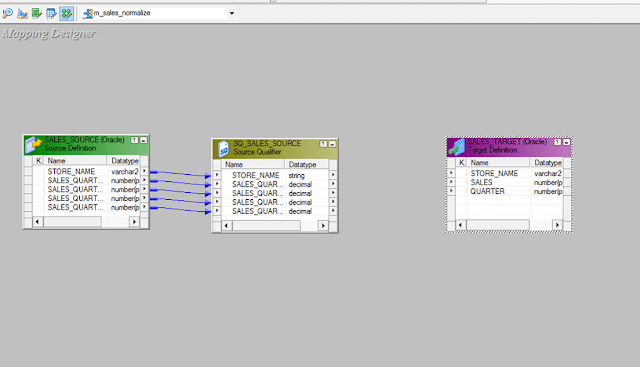
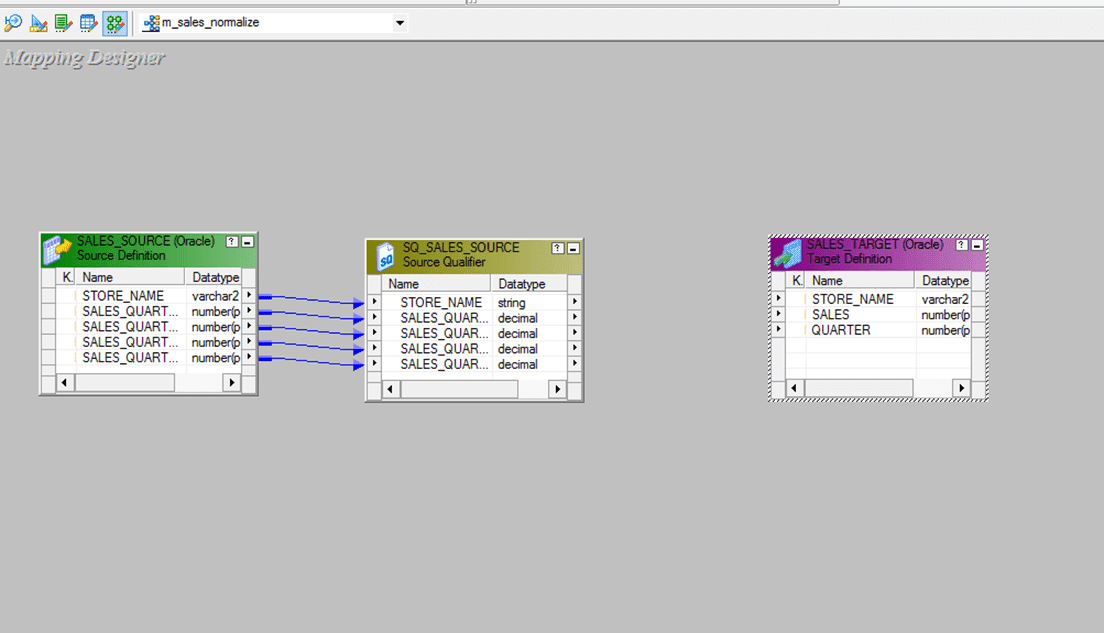
Step 2 – Create a mapping having source "sales_source" and target table "sales_target"
Step 3 – From the transformation menu create a new transformation
- Select normalizer as transformation
- Enter name, "nrm_sales"
- Select create option

Step 4 – The transformation will be created, select done option

Step 5 – Double click on the normalizer transformation, then
- Select normalizer tab
- Click on icon to create two columns
- Enter column names
- Set number of occurrence to 4 for sales and 0 for store name
- Select OK button

Columns will be generated in the transformation. You will see 4 number of sales column as we set the number of occurrences to 4.

Step 6 – Then in the mapping
- Link the four column of source qualifier of the four quarter to the normalizer columns respectively.
- Link store name column to the normalizer column
- Link store_name & sales columns from normalizer to target table
- Link GK_sales column from normalizer to target table

Save the mapping and execute it after creating session and workflow. For each quarter sales of a store, a separate row will be created by the normalizer transformation.
The output of our mapping will be like –
| Store Name | Quarter | Sales |
| DELHI | 1 | 150 |
| DELHI | 2 | 240 |
| DELHI | 3 | 455 |
| DELHI | 4 | 100 |
| MUMBAI | 1 | 100 |
| MUMBAI | 2 | 500 |
| MUMBAI | 3 | 350 |
| MUMBAI | 4 | 340 |
The source data had repeating columns namely QUARTER1, QUARTER2, QUARTER3, and QUARTER4. With the help of normalizer, we have rearranged the data to fit into a single column of QUARTER and for one source record four records are created in the target.
In this way, you can normalize data and create multiple records for a single source of data.
No comments:
Post a Comment